Modernist Foodie

Food escapades in modernist cuisine

Sous Vide Miso Chicken, Garlic Tofu Emulsion, Carrot Puree, Celery


I'm a big Top Chef fan, and the most recent season in Seattle just finished up with Kristen Kish emerging as the winner. Kristen dominated all season long until that one week where she got screwed by Josie and got voted off unfairly, so I was glad to see her battle through Last Chance Kitchen and come back all the way to win. She also works for Barbara Lynch at Stir, so it was also great to see a chef from the Boston area succeed and represent!

A few weeks ago during the elimination challenge of Episode 9, Kristen put a twist on a familiar classic - chicken pot pie. She put together a deconstructed version and added some Asian flare to the dish by marinating the chicken breast in white miso and making a garlic and tofu emulsion as the "gravy". I thought it was a really creative way to reinvent the dish, and I was inspired this weekend to make it myself at home.

After my wife and I had lunch today in Quincy at Pho Countryside, we stopped by Kan Man supermarket to grab some groceries. We picked up some celery, carrots, white miso, chicken breasts, tofu, and garlic. Later in the afternoon, I started preparing dinner.

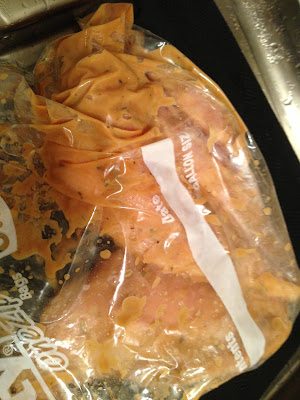
The chicken takes longest to cook, so I started with that first. I mixed together some white miso with  chopped herbs like rosemary, thyme, and parsley and then smeared this all over the chicken breasts. I sealed the breasts in a Ziploc bag, removed as much air as possible using the water displacement method, and then dropped the bag into my Sous Vide Supreme at 140 degrees F for about one hour.


I then put together the carrot puree, first simmering some peeled and chopped carrots until fork tender and then blending in my Vitamix with some carrot juice, olive oil, salt and pepper.


I also brought some chicken broth up to a boil and then poured the hot broth over some celery that I finely sliced using a mandoline. I let the celery poach in the warm broth until I was ready to plate.


For the garlic and tofu emulsion, I first cleaned a head of garlic and then blanched the cloves in boiling water six times, replacing the water each time. The blanching of the garlic helps remove the sharp, raw garlic flavor. I then added some half and half (Kristen uses soy milk), salt, and tofu, simmering the garlic cloves until they were tender. All of this went into my Vitamix to be blended together.


After the chicken breasts cooked in the immersion circulator for about an hour, I took them out and put them in a sautee pan over medium-high heat. I added in some agave syrup and some of the chicken broth the celery slices were soaking in. The syrup and broth combined with some of the miso on the exterior of the chicken to form a nice glaze. After a few minutes in the pan, I took the chicken breasts out of the pan to rest to let the juices reabsorb and redistribute before slicing.


With all the components prepared, there was nothing left to do except plate up and eat! Overall, I thought the flavors combined well and were subtle yet sophisticated. The chicken which was sous vide was incredibly moist and tender. My favorite part was the miso glaze. There wasn't much to complain about but if I had to criticize one thing, I would say that there weren't many contrasts in texture. The chicken, carrot puree, and soy garlic emulsion all were velvety and smooth in consistency. There was some crunch from the celery but not much as they were lightly poached. Kristen's dish includes olive oil dumplings, which I did not make, but that wouldn't have added any texture either. Overall though, the dish was very refined and tasted great. Here's the final dish again.

Ancho Beer Braised Short Rib Tacos


Tonight I made some bomb ass Mexican-inspired braised short ribs, and it couldn't have been simpler. Usually most recipes for braises require you to sear the meat over the stove before simmering on the stove or roasting in the oven, but I avoided that mess altogether and the results were still outstanding - the secret is using minimal liquid and moderate temperature for sufficient time in the oven. Three hours at 325 degrees F gets the meat fork tender and also triggers the Maillard reaction on the meat, giving you that dark brown coloring you're looking for.

Here's the recipe:
  • .5 cup cider vinegar
  • 1 bottle of beer (I used Harpoon IPA)
  • 2 oz dried ancho chiles (stemmed, seeds removed, and soaked a little warm water)
  • Half head of garlic smashed
  • 2 teaspoons salt
  • 2 teaspoons dried oregano
  • 2 teaspoons cumin
  • .5 teaspoon cinnamon
  • .5 teaspoon clove
  • .5 teaspoon black pepper
  • 2 bay leaves
  • one medium-sized spoonful of tomato paste
  • 1 large onion (sliced in half inch slices)
  • 1 pack of beef short ribs (I got mine for BJ's)
  • Cabbage, red onion and carrot slaw - get the recipe here

Add all of the ingredients, except for the onion and short ribs, in a large Dutch oven pot and mix to combine.


Layer the slices of onion on the bottom of the pot.


Place the short ribs on top of the onions.


Cover the pot, and cook in a 325 degree F oven for 3 hours.

 
When they come out of the oven, the short ribs will look like this - nicely browned.
 

Remove the short ribs to a plate, and then finish the sauce. Skim off any fat that pools at the surface and discard the bay leaves. Place all of the pot contents into a blender - I used my trusty Vitamix - and blend until smooth.


Meanwhile, use two forks to shred the short ribs, and add the shredded meat back to your Dutch oven.


Dump the blended sauce back into the pot and combine with the meat. Heat gently to warm.


Finally, build your tacos! Take a heated, softened corn tortilla, add some of the delicious short rib meat, and top with the veggie slaw, chopped cilantro, and crumbled Cotjia cheese. Enjoy!

Cabbage, Red Onion and Carrot Slaw

Whenever I visit my favorite neighborhood Thai restaurant, I always order a green papaya salad. I've always wondered how they get such nice, uniform julienned cuts of papaya. The last time I went, I happened to get a glimpse of the chef preparing it and noticed she was using what appeared to be a peeler with a special blade.

I went home and searched on Amazon for "green papaya peeler" and this - the Kiwi Pro Slice Peeler - came up as the first search result. I decided to give it try, and it turns out it was exactly what I needed. For $5.65 plus free 2-day shipping with Amazon Prime, this product is an absolute steal. I'd say I have decent knife skills, but julienning a bunch of vegetables, whether it be carrots or daikon, is a tedious, time-consuming task. This tool eliminates a lot of the headache. I've only had it for a week, and I've already used it a bunch of times. It's becoming one of my favorite kitchen gadgets.

I used my special peeler for julienning some carrot for a pickled slaw that I paired with a Mexican-inspired ancho chile and beer braised short rib dish for tacos. The recipe for the slaw is basically a combination of shredded carrot (1 medium), cabbage (half a head) and red onion (half of a medium sized) - I used the peeler to cut the carrot and a mandolin for the latter two. Combine the vegetables with 1 tablespoon sugar, 1 cup of cider vinegar, .5 cup of water, 1.5 teaspoons salt and 1 teaspoon dried oregano. Let the slaw sit in the pickling liquid for a few hours and then drain before serving. Don't worry about including the onion, as it becomes very mild through the pickling process.


Fried Brussels Sprouts, Fish Sauce, Garlic, Chilis

Growing up as a kid, I never really liked eating Brussels sprouts. However, as an adult, I certainly have acquired a taste for them. I usually oven roast or sauté them in a pan on the stove top but I must say that my absolute favorite method of cooking them is deep frying - yes, deep frying!

The exterior leaves get somewhat crispy and caramelized, and the flavor is deep, rich, and extremely savory. They are great on their own with a sprinkle of salt, but if you really want to put them over the top, dress them in a spicy thai-inspired vinaigrette with fish sauce. You might think fish sauce is unusual but it's not much unlike the Italian bagna cauda sauce, which uses anchovies.

Here's what to do:

  1. Pre-heat a deep fryer to 375 degrees F - I use the Waring Pro DF280 but if you don't have a dedicated deep fryer, alternatively you can use a dutch oven or large pot. To measure the temperature of oil, make sure you do so safely and use a thermometer that can measure high temps like a Taylor Thermocouple
  2. Slice the brussels sprouts in half
  3. Once the frying oil is up to temp, drop them in and fry for 2-3 minutes until brown and caramelized
  4. Remove from fryer and drain on paper towels to remove excess oil 
  5. Prepare thai vinaigrette by finely chopping thai bird chilis, grating a few garlic gloves using a microplane, and combining with fish sauce.
  6. Dress the brussel sprouts with the vinaigrette and enjoy!


Rancatore's Ice Cream

Rancatore's Ice Cream
1752 Massachusetts Ave, Lexington, MA 02420
(781) 862-5090

This past weekend my wife and I drove up to Burlington to grab some groceries at H-Mart. As we headed home, we drove through Lexington and decided to make a pit stop in the town center to grab coffee. We ended up randomly passing by an ice cream shop called Rancatore's and decided to stop in. There's a decent flavor selection, but what caught my eye was the "Tiger Milk" flavor. I asked the girl behind the counter what this flavor was all about, and it turns out they soak frosted flakes in the milk/cream and what's left over is the "tiger milk" that they use to make the ice cream. Momofuku Milk Bar's cereal milk flavor immediately came to mind, and my mind was set as to what to order. We ordered a small size (which actually isn't that small and comes with two scoops), so we also tried the hazelnut cream. The ice cream is dense and rich with a chewy consistency. Both flavors were excellent but I was really enamored with the tiger milk. I can't wait to go back!


Modernist Foodie Copyright © 2013